

Learn how to write a children’s book, from developing ideas and characters, to finding the right illustrator.
Being in the business of helping children’s book authors find their feet in the complicated and challenging world of book writing, publishing and illustrating, I have met many people aspiring to be successful authors. A common question that comes up is, ‘I want to write a children’s book. Where do I start?’ or they would say, ‘I really want to but do not know how to write a children’s book.
Based on what I’ve learnt in working with authors, I decided to write this article to help aspiring authors to learn how to write a children’s book.
This guide is not only meant for aspiring authors. It’s also for those who have tried, but ended up failing or not getting the result they wanted.
Ready to get started?
When starting to write a children’s keep this in mind:
- You need to practice
- Which age group your children’s book is for
- Getting ideas for writing a children’s book
- Developing your characters
- How long a children’s book should be
- You should get feedback and editing
- What you should not do when writing a children’s book
- You can use our How to write a children’s book checklist
- Find the right illustrator
In this guide, I will cover the points above and help you write the best children’s book you can. Once you understand how to write a children’s book, all you need to do is practice. Let’s look at that and what it takes.
Practice
Many aspiring authors believe their first story is the best they can do, but that is almost never the case. As in any profession, you need to practice, practice, practice and hone your craft.
When I recently interviewed 26 writing experts on our online Children’s Book Mastery conference, this next point came up repeatedly. I loved the way Laura Backes from writeforkids.org and writingblueprints.com stated it: “Your first manuscript, probably your first three or four manuscripts, may be practice, where you’re working on finding your own voice and creating your own style. And those are very necessary, important manuscripts. Too many writers write one manuscript and submit it and it gets rejected and then they give up. And they didn’t realize what they were submitting was their practice manuscript.
“So every story that you start, don’t go into it saying: ‘I want to get this one published.’”
“Go into it saying: ‘I want to learn how to write this story in the best possible way I can,’ and once it’s done, then you can decide if it’s good enough to submit. And I would suggest having a critique group to help you with that decision, because getting that outside objective input is very, very important.”
I know as an author you get excited about your ideas, and that’s how you should feel. Your story is close to your heart, and you want to share it with the world. But for that exact reason, your story deserves to be the best version of itself you can create. And that takes practice.
So write, write, write. It might surprise you how much you improve. So you can see, knowing how to write a children’s book is only one part of the recipe.
Which age group is your children’s book for?
If you are planning on writing a children’s book and getting it published, you must identify which age group your kid’s book is for.
The age group determines a lot about the book, like length, use of language and amount of illustrations.
It’s also essential that your book’s topic matches the age group it’s intended for. Homework or popularity might concern middle graders, but not three-year-olds . Being clear on your age group means you communicate to the target audience on their level and about things which interest them in a way they can understand.
Fitting your book into a defined age category also makes it possible to position your book correctly in online stores like Amazon and on the bookshelf in physical stores.
Understanding these things will help your book to sell.
Here is an article where you can learn about how books are divided into age groups, with word counts and the different kinds of books for each age group.
Ideas for writing a children’s book
Your whole journey may have started with an idea, so you may already have had an idea for your book before identifying your age group. If not, the next step is to develop an idea for your book.
As mentioned, the age group also plays a role in what you can and can’t write about, so if you’ve chosen an age group before having your idea, that can help you come up with an idea. What do kids in this age group deal with, think about, worry about, laugh about?
Since that’s pretty broad, also choosing a genre is a good starting point to coming up with an idea.
Here are some popular genres:
- Realistic Fiction
- Traditional literatures (like fairy tales, tall tales, fables and folktales)
- Poetry
- Sci-fi
- Fantasy
- Mystery
- Nonfiction (fact-based, auto-biographies and biographies)
One of the simplest ways to get ideas for your kid’s book is to use a children’s book ideas generator.
A good story idea generator should inspire you by helping you develop characters with personality and depth and an interesting plot.
Remember what I said about practice? Generators can be especially helpful to practice your writing. Any of your practice manuscripts along the way could be good enough to publish, but using these generators to practice can help you get to that level.
One good plot generator is Masterpiece Generator. It has an easy-to-use interface and can help you come up ideas, including children’s book ideas with morals.
To get started, fill in the entire form. Alternatively, you can click on “fill entire form with random ideas.” Finally, you can click “Write me a fairytale,” and the site will redirect you to a new page with a sample fairytale. This can give you a good starting point for your own story.
Other innovative online tools that can help you come up with ideas or to overcome writer’s block include:
You can also get ideas by interacting with children. Observing what they do and listening to their stories can help you develop compelling stories about their everyday concerns, experiences or flights of fancy.
You can also draw inspiration from your childhood. Just take a walk down memory lane.
Develop your characters
Every good fiction story (and even nonfiction biography) starts with a character. The main character will largely drive the story, so while he, she or it doesn’t have to be extraordinary, they need to be interesting.
What makes a character interesting? This varies from reader to reader, but one requirement is they must possess at least one trait that engages the reader. The most loved characters are relatable, funny, endearing, exciting, or admirable—or a combination of these.
A main character slightly older than, or about the same age as, your reader would be the norm. This also makes the character more captivating for your audience. Have you seen how 3-year-olds tend to follow 5-year-olds around or copy them? Well, it’s kind of the same thing with book characters!
Create a character that you love. Make sure the character is well-developed, so they become real, first to you, and then to your audience. To achieve that you have to ensure the character is not only three-dimensional in your head, but that you truly capture them on the page!
A valuable tool to develop great characters such as The Little Prince, Winnie the Pooh, or Peppa Pig is a character interview.
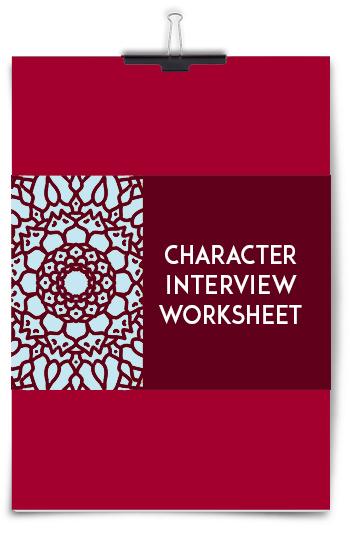
To help you develop relatable characters, here is a downloadable character interview for you, created by children’s book author and editor, Marcy Pusey.
Asking your characters the questions from the interview will help you develop first-rate characters.
For realistic fiction, the character will be a boy or girl. For a fairy tale or fable it could be a prince or princess, a pirate, fairies or other magical creatures.
How long should a children’s book be?
It’s essential to figure out how long your kid’s book should be. The best way to do so is by determining the age group of your audience. You can learn more about writing for different age groups in this article.
Here is a quick summary:
- Board books: 0 to 500 words–Ages 0 to 4 years
- Early Picture Books: 200 to 500 words–Ages 2 to 5
- Picture Books: 500 to 1000 words–Ages 5 to 8
- Early readers: 1000 to 3000 words–Ages 4 to 8
- First chapter books: 5,000 to 10,000 words–Ages 6 to 9
- Middle grade novels: 30,000-50,000 words-Ages 8–12
- Young adult (YA) novels: 50,000-80,000 words-Ages 12-18
- Nonfiction books for all these age groups have a slightly higher word count than their counterparts for that same age group
If you are planning on writing a board book, aim for less than 200 words for babies. For any of these age groups, if your book is too long, it won’t be successful.
Parents don’t want to read picture books with a lot of text on each page, and young kids will lose interest. Kids who are just beginning to read won’t read 10,000 word novels.
To learn more about different children’s book categories, visit the local library or bookstore and study the books that fall under your target age group.
How many pages should a children’s book be?
Whether you’re publishing your book as an ebook, printed book or both; to ensure success, it’s best to stick with the industry standards.
Here is a general idea of different book categories with their standard number of pages and illustrations.
|
Category |
Page Count |
Illustrations |
|
Board books |
12 to 16 |
Every page |
|
Picture books |
32 (or 32+) |
Every page |
|
Early readers |
32 to 64 |
Every page |
|
Early chapter books |
30 to 60 |
Every two to four pages (often black and white) |
|
Middle grade books |
64 to 180 |
One to a few per chapter (often black and white) (Sometimes no illustrations) |
|
YA books |
180 to 320 |
Few or none |
Picture books
If you have watched Miss Potter, the movie based on children’s author Beatrix Potter, then you may have noted something interesting about the number of pages in a children’s book. If you haven’t watched the movie or missed the concept, let me explain it.
In the movie, Beatrix had the idea to have her book published in black and white to keep the cost low. The publisher had a different idea that would cut the costs and keep the price per book low.
The publisher’s idea was to have all the pages printed on a single sheet and then cut it up. This made it possible to make the books in full color, but affordable. This genius plan was partly responsible for Beatrix Potter’s books’ huge popularity.
This is called offset printing and is responsible for picture books most often being 32 pages long. You start with one large sheet called the “parent sheet”. If the final book has larger than average dimensions, one will have two parent sheets. They then print all the pages of the whole book on the parent sheet and fold and cut them. You end up with 16 sheets (folded in half = 32 pages).
These are divided into two groups of eight that are both folded in half to create what’s called a “signature”. (More than 8 sheets together is usually too thick for binding.) A signature is 16 pages (8 sheets folded in half = 16 pages). These two signatures together make the 32-page book.
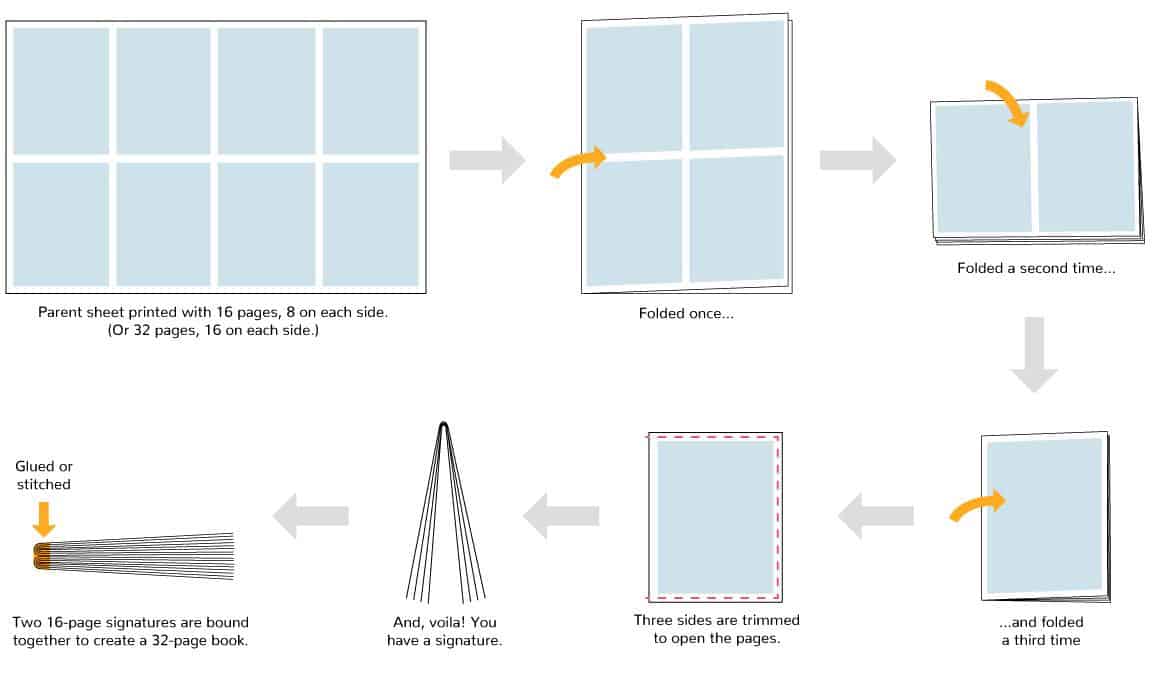
Depending on your printer, you can create a 24-page book (this is the lowest page count KDP accepts) or a 40-page book, but most printers need your page count to be multiples of 8 or 4. So check this when you’re working on your book, so you don’t have an unpleasant surprise when you’ve completed everything!
Here is a layout of a 32-page book.
The first 2 to 5 pages makes the front matter. They include the title page, half-title page, dedication page and copyright page. That means you have 27 to 30 pages for the story.
If you intend to only publish your picture book as an ebook, you may wonder if you need to have 32 pages. The answer is yes and no. If you’re confident you will never print, any page count is fine. But let’s say your ebook does well and people would like printed copies, then you’d have to change the book to match a printable page count. So it’s worth keeping this in mind from the start.
As mentioned before, with KDP Print On Demand you can print a 24-page book. Note that print on demand has higher per-unit costs.
Action Step: Go page through numerous books in the age group and genre you write (or intend to write) for at your local library. Check the page counts and on which page the story starts and ends.
Get feedback
It may be hard to swallow, but get feedback. Join a group where you will get good feedback, though. Simply giving your book to anyone may end up giving you more losses than it helps you. A good solution for this is to join a critique group or get beta readers.
Make sure the readers know what makes a good story and characters, so they can express flaws to you in a way you can understand. And preferably make sure their English (or whichever language your book is written in) is excellent, so they can point out grammar problems too.
Click here for a good article that explains why every writer should belong to a critique group.
You can form your own critique group (make sure they’re in the same niche!), but here are two good existing ones to join:
http://www.kidlit411.com/p/ms-swap.html
https://www.goodreads.com/group/show/50920-beta-reader-group
Editing
You can decide if you will get professional editing, depending on your experience level and how good your critique group or beta readers are.
I am an advocate for editing because a professional editor can take your book from good to great.
Editing has four stages:
- Developmental or structural editing: This is a big-view look at your manuscript to make sure there are no problems with the story itself. It covers plot, story structure, characterisation, flow, organization and pace.
For a chapter or YA book this is done at a chapter level and is an extensive job. For a picture book with less than 500 words, it’s less extensive (but can be just as important and helpful!)
- Content editing is a closer view editing similar to developmental editing. Here you are looking at smaller sections and you won’t remove five pages of text anymore, or move large pieces of the story around. It includes making sure the story flows and makes sense, fleshing out certain scenes or dialogue, clarifying sections as needed and so on.
- Copy, line-by-line, or line editing: This is, as the name says, line-by-line editing of your manuscript. It checks for sentence structure, grammar, inconsistency, repetition, and makes sure the readability and accuracy is good.
- Proofreading is the last step and is a thorough examination of your text to correct typographical and spelling errors.
For your first book, I’d recommend a full edit, meaning all four steps. This way you can see where your strengths and weaknesses are and how much editing was needed on your book.
If you can only afford one type of editing, go for copy editing (line editing).
If you’ve practiced to become a good writer, taken care with your manuscript and had your critique group and/or beta readers read your manuscript, your story shouldn’t be a mess. Your beta readers should catch huge plot holes, or inform you if there are problems with your characterization and so on.
Yet, as anyone who reads a lot will tell you, bad grammar can undo the best story (and it will get you bad reviews). So get copy editing to clean up your manuscript.
What should you not do when writing a children’s book?
You want to wow your audience with your book. This isn’t easy to achieve, as accomplished authors can attest to.
To be successful, you need to avoid the following mistakes when writing for children:
Taking forever
Don’t take forever to write your book. It will help a lot to adopt the viewpoint of making each manuscript the best you can, but not starting out with the mindset that you have to publish it. If it’s not great, it was practice, and you’re one step closer to writing a great book.
Write every day for a couple of months and then go back to your first day’s writing, I guarantee you’ll see how much you’ve improved. You can even start with that one story you truly want to share with the world as your first manuscript. But then write more stories until you recognize you’ve become a better writer. Then go back and improve that first manuscript before publishing it.
You don’t have to take years, or even months, to complete your first ready-to-publish manuscript, though. Not taking forever comes down to writing and not overthinking, over-researching or endlessly doing “other things” to improve your writing…rather write, write, write, and soon you’ll have a great manuscript!
Stopping at one book
The children’s book market is competitive. If you can achieve success on your first kid’s book, congratulations! You’ve achieved something many writers only dream about.
While you should celebrate that as a wonderful accomplishment, still write more books! Even more so because if people loved your first book, they’ll want to read more from you. Do not stop at one book. Write more, or write a series.
Using big words
Some writers make the mistake of using too advanced vocabulary in their books. Young children have yet to develop their reading skills and vocabulary. If you use big words, they will lose interest. Simple language is more effective, as explained here.
For picture books, you can use some words the child may not understand yet, as the pictures will help them understand and they also expand their vocabulary this way. But too many big words will lose your audience.
The same holds true for middle grade and YA. A few uncommon words can help your readers improve their language skills and make your writing more interesting, but many words the reader understands will lead to frustration and they’ll probably close the book. Plus, it can seem pretentious.
It’s been proven that simple language is more effective in reaching people. This is with writing and speeches. Here is an interesting article that explains more.
So don’t be a sesquipedalian and go overboard with high-falutin language! (See what I did there?)
Big words confuse your readers. To keep your audience interested in reading more of your books, keep it simple.
*sesquipedalian: (noun) someone or something that overuses big words
*high-falutin: (adjective) (especially of speech, writing, or ideas) pompous or pretentious
(You’re welcome 😉 )
Being overly complicated
As with using big words in your book, don’t be too complicated. This extends to your writing style and concepts.
What is overly complicated? That depends on the age of your reader, so it will require some judgement on your part. I’d say it is always safer to err on the side of simplicity.
As mentioned a moment ago, simple language is more effective. This extends beyond the vocabulary. Long, complex sentences are hard to understand and can lose the reader. At best, the reader will find the book taxing to get through.
Think of a time you read a novel that wasn’t easy to read and understand. I’ve stopped reading more than one novel because I thought, “I’m reading this to relax and enjoy it, not to do mental gymnastics.”
Avoid complex sentences as they confuse your readers. Instead, use short and simple sentences. The younger the reader, the shorter and simpler they should be.
This should include the theme and concepts of the story. Quantum physics will be over a two-year-old’s head. But more everyday topics will be too, especially depending on how you address them. For example, you can write about relationships, emotions, or problems, but address them at a level the reader can understand. Once again, this changes as readers get older.
Using poor illustrations
Books for younger children are not complete without illustrations. As listed earlier, the illustrations become optional as you move up in age groups, but the fact remains you need excellent illustrations if you have illustrations in your book.
If you want to give your young audience a sense of wonder and fun, do not use poor illustrations. Even a great story can lose its audience (or never take off in the first place) if you have mediocre illustrations.
Without going into too many details, there is more to consider regarding great book illustrations than most people realize. It’s not only about drawing well.
Bottom line: Get a professional book illustrator.
Inferior layout or design
Poor layout and design can lead to a bad experience for your audience.
Firstly, your book cover. People really do judge a book by its cover. Taking one of your illustrations and slapping the title on there isn’t good enough. Get a professional cover. It’s first job is to attract attention, and then to convince the person to check it out further and that it’s worth their time.
Get a cover that is not only visually pleasing, but that captures the spirit of your story, whether that be funny, magical, tender, etc.
Other books will surround your book, whether it’s online or in a physical bookstore. If the cover isn’t fantastic, no one will even give it a second glance. That said, you can use this to your advantage by making sure the cover is irresistible.
The next thing—one of my pet hates as a parent who reads picture books to my three-year-old every night is trying to read black text on a navy background. Or charcoal background. Or text printed over a crazy busy background.
Work with a professional illustrator who leaves space for text where needed, and a professional formatter (if your illustrator isn’t doing your layout) who won’t make these kinds of mistakes.
Other than this, things like page turns are very important, specifically in picture books. This means putting something in the text or illustration that makes the reader want to turn the page to find out what happens. It also includes illustrations that lead the eyes from left to right, to where one turns the page. Again, work with pros that will implement these things in your book.
Bad design and layout includes a few other things, like:
- Too many elements on the cover or pages
- Design, font or illustrations don’t match the genre
- Poor image quality
- Page numbers on the title page, copyright page and any blank pages
- Inconsistency (in fonts, layout or style)
Bad choice of font
This is part of poor design, but deserves its own subheading.
In my experience and asking others, I’ve found simple fonts are best. This is true whether the parent or the child will be doing the reading. Decorative fonts can be wonderful in moderation, but can be a headache to read throughout the whole book.
You can still choose a cute, fun or funny font that suits your audience or book topic, but make sure it’s easy to read. If you look at bestsellers, you’ll note none of them are published in wild fonts.
On the other end of this, choosing a font that’s too plain, specifically for the cover, can also be a mistake.
Here are a few great examples of fun, legible fonts that suit the stories they tell:
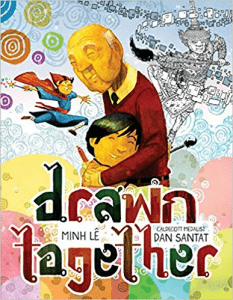
Drawn Together by Minh Lê (cover and interior)

The Going to Bed Book by Sandra Boynton (interior)
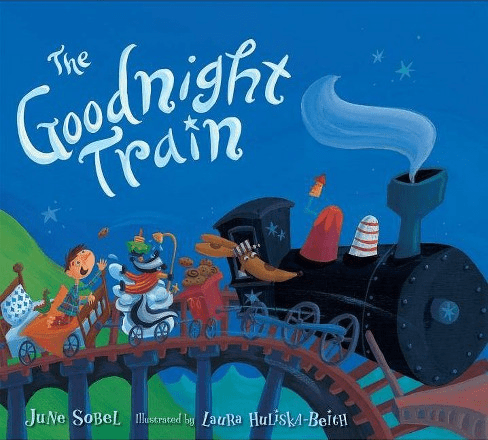
The Goodnight Train by June Sobel (cover and interior)
Making the moral of the story too obvious
Children’s books often have lessons such as the importance of kindness, persistence, courage and so on. Never make the moral of the story too preachy or too obvious. This makes your book uninteresting or unappealing.
Instead, weave the story so that it encourages engagement and critical thinking.
Respect your reader and their ability to work things out for themselves.
How to write a children’s book checklist
I’ve created this downloadable checklist to help you quickly structure your children’s book writing process. Using the information available in our guide, How to Write a Children’s Book, will speed and improve your efforts.
How to Write a Children’s Book Template
To make life a little easier, I have created a downloadable free children’s book template PDF that will guide you through structuring your children’s book. You can fill this template out on your computer, or print it out and fill it out. It will simplify the process for you and get you started on your way to a great manuscript!
Download the How to write a children’s book template here.
Find the right illustrator
One of the most important aspects of any children’s book is fantastic illustrations.
Picture book illustrations aren’t mere drawings, they’re part of the story and need to tell a story in their own right.
They engage your young readers and greatly assist their understanding of your story.
While some illustrators are very talented artists, they may not know what is needed for BOOK illustrations.
In brief, book illustrations have special requirements, like drawing the same character(s) again and again consistently, in different situations, from different angles. The illustrations need to create a dynamic flow throughout the book. Using the same angle, distance, character stances and so on for each page will become boring. They should lead the eye from left to right… The list goes on, and that is without mentioning other factors like the technical aspects for printing.
There are two formats for text and illustration combination. You can decide what you’d like in your book, with your illustrator, or with another professional helping you with your book (like a book designer or self-publishing coach).
The two format are:
- Text and image separate
- Text as part of the image
You can also use both within one book, varying from spread to spread.
1. Text and image separate
When you choose “text and image separate”, you can have the text above or below the illustration or on a separate page. This is seldom seen in picture books (as picture books tend to be fully illustrated on each page), but is common in middle grade books.
Picture book example:
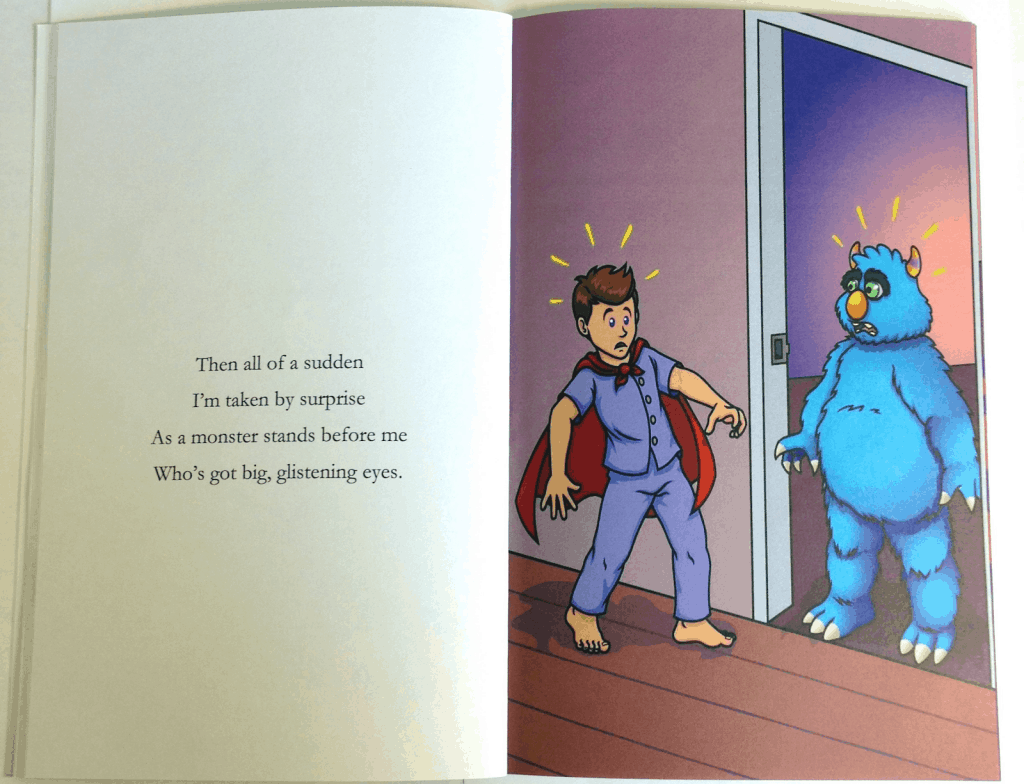
Spread from Pete’s Monster by Fay B. Bolton
Middle grade book example:
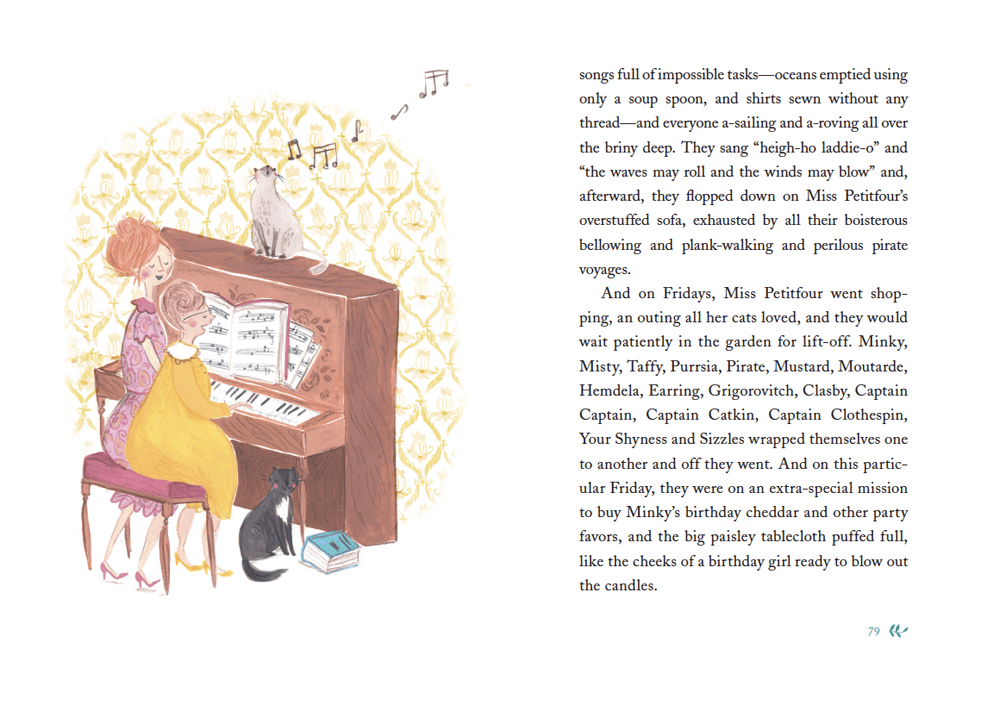
Spread from The Adventures of Miss Petitfour by Anne Michaels.
Illustrator: Emma Block
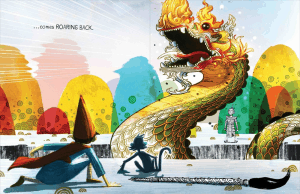
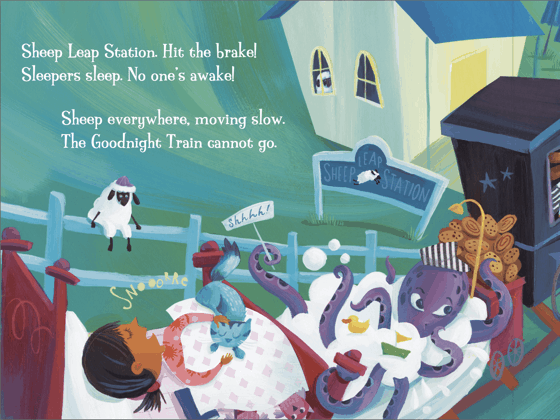
2. Text as part of the image
This method is popular with full-color children’s books that are illustrated on each page, thus the text will naturally be on the illustrations.
Example:
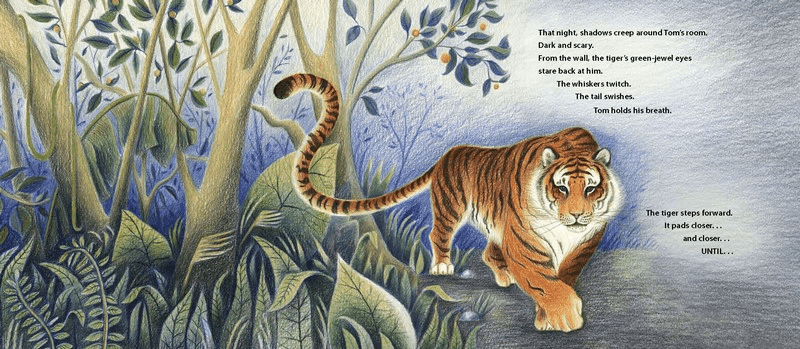
Spread from Tiger Walk by Dianne Hofmeyr. Illustrator: Jesse Hodgson
Spread or full-page illustrations throughout your book makes the reading experience fun and engaging.
As mentioned before, there has to be space for the text where it will be easy to read. This is where finding a professional illustrator comes in.
At GetYourBookIllustrations we always make a point with our illustration services to not only create illustrations, but illustrations that will work with the final format of the book. And we’re more than happy to help you work out which format will be best for your book.
Feeling more like you know where to start when writing a children’s book?
Writing your first children’s book is a bit like playing chess. Make smart moves if you want to win. Following the tips in this article will get you a few steps closer to success. And by reading this article you are one step closer since knowing how to write a children’s book is the first step.
Follow these steps, keep learning, and soon you will publish your book and start plotting the next one!
Remember, we’d love to work with you to create the best cover, add tons of value to your story, and engage young minds.
Did the tips above improve your knowledge on how to write a children’s book?
I’d love to hear from you in the comments:
1.What is your biggest takeaway from this article?
2.Which question of yours didn’t I answer? Post it so I can help you out!
Best of luck!
FREE Webinar: How To Write A Picture Book Without Self-Doubt Or Procrastination, Even If You’ve Always Struggled To Turn Your Idea Into A Story.


It’s been my dream to write books
Great, now is the perfect time to get started! 😉
These articles have been so helpful. Thank you for posting them!
I teach in a middle grades alternative school. I’m looking for ways for my kids to improve their writing and came across your article. I would like permission to copy and teach it to my students with a final book being ready to publish. Please let me know. Thanks.
Hi Sheila, thank you for visiting our site. Yes you can go ahead and copy it for the purpose of teaching to your students.